Basic Affinity Photo tutorial for preparing scientific figures
Feb 27, 2023
Making scientific figures is not an easy process. Unlike digital art, you're not offered much room for creativity, as it is more important to present the data than to make figures look aesthetically pleasing. Additionally, getting an image-editing software can be an immense pain, as many image-editing software suites now are pushing some extravagantly-priced subscription models.
This was certainly the case for our lab. We tried to obtain the Adobe Creative Cloud suite, as it was offered to faculty and staff for free through our university, but surprise, surprise! Graduate students do not count as research staff. Classic.
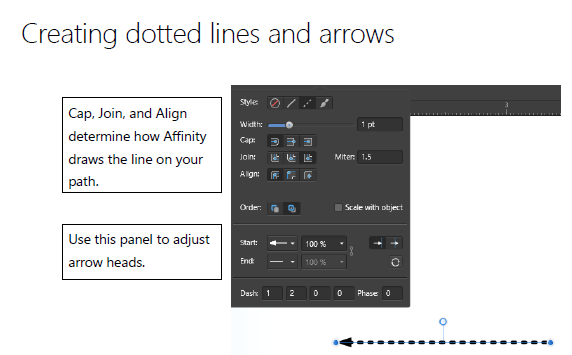
In search for alternatives, I did some research and purchased perpetual licenses for Affinity Photo 1.0 (As of this post, the latest version is 2.0, which I haven't tried). This software has great value, despite its hiccups in performance and text, and I would highly recommend it as an alternative to Adobe Photoshop for figure making. Some features are actually better in my opinion. Affinity Photo draws dashed lines and arrows splendidly, with relatively straightforward options.
 Affinity's interface for adjusting the style of line strokes.
As I had plenty of experience working with Photoshop and other image/art programs in hobbies as a digital artist, picking up Affinity Photo was relatively simple. However, there is a steep learning curve for using any image-editing software for the first time, so I put together a (silly) workshop for my group members.
I'm sharing the basic tutorial here. The tutorial consists of a .zip file, with images to practice with, and a PDF of the slides on that workshop day. I don't cover everything there is to know about Affinity Photo; just the basics, like selection, layers, colors, lines, and shapes. Some of the skills in there are transferrable to other image-editing programs like GIMP or Photoshop. (Hah!)
Hope you find the basic tutorial useful! Happy figure-making!